Creating no drama, Free SSL Certificates with a little help from tralum.
*Tech Specs. At the time of this writing, I am utilizing a Windows 10 server with IIS 10.
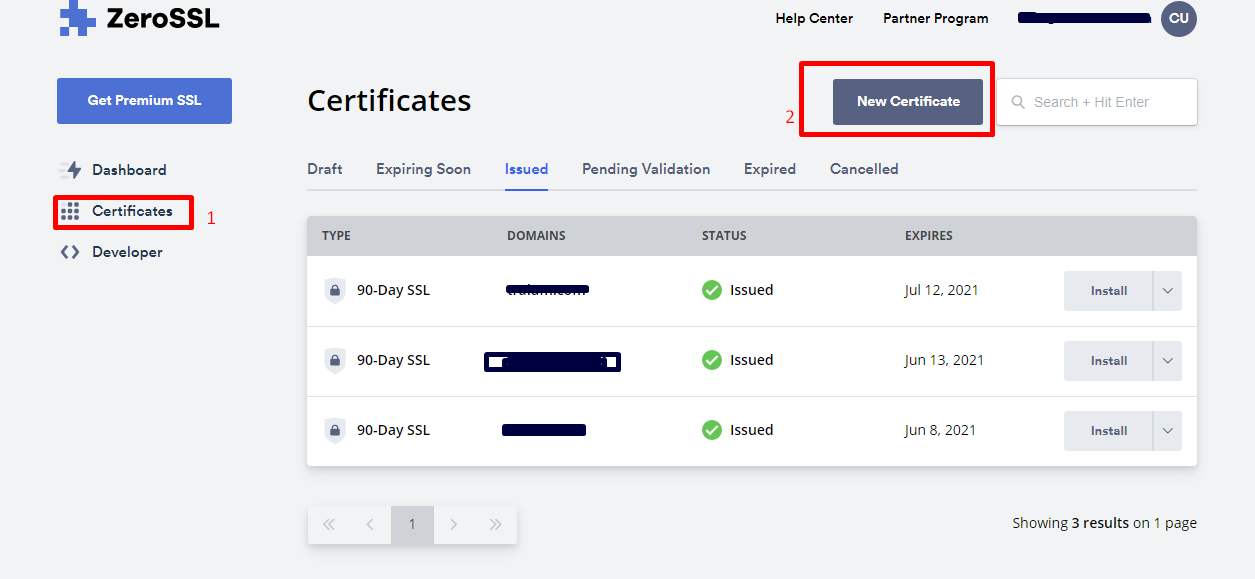
First things first. Go to ZeroSSL and sign up! You’ll need to register in order to utilize the free 90-day option SSL Certificates (you get up to 3 certificates; unfortunately no wild cards). Once you are logged in you will need to go to the “Certificates” tab (1) and then click the “New Certificate” button shown below.
Adding Certificate Information
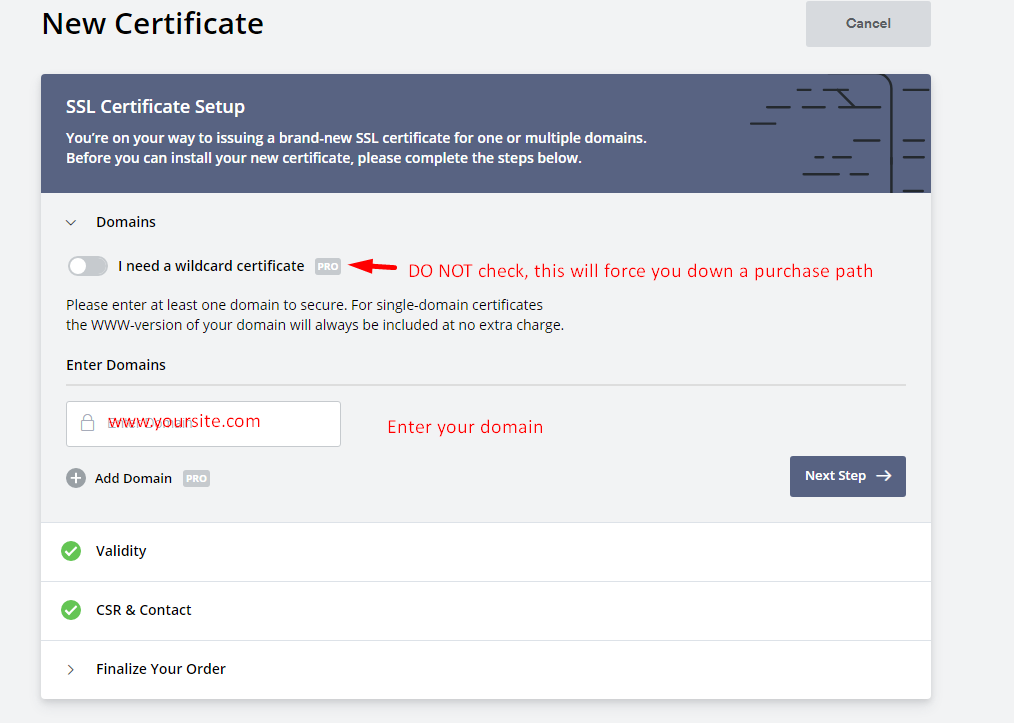
First Add your domain, DO NOT click wildcard. This option has next to it “Pro” meaning at the end of finalizing you will need to pay for the Pro plan.
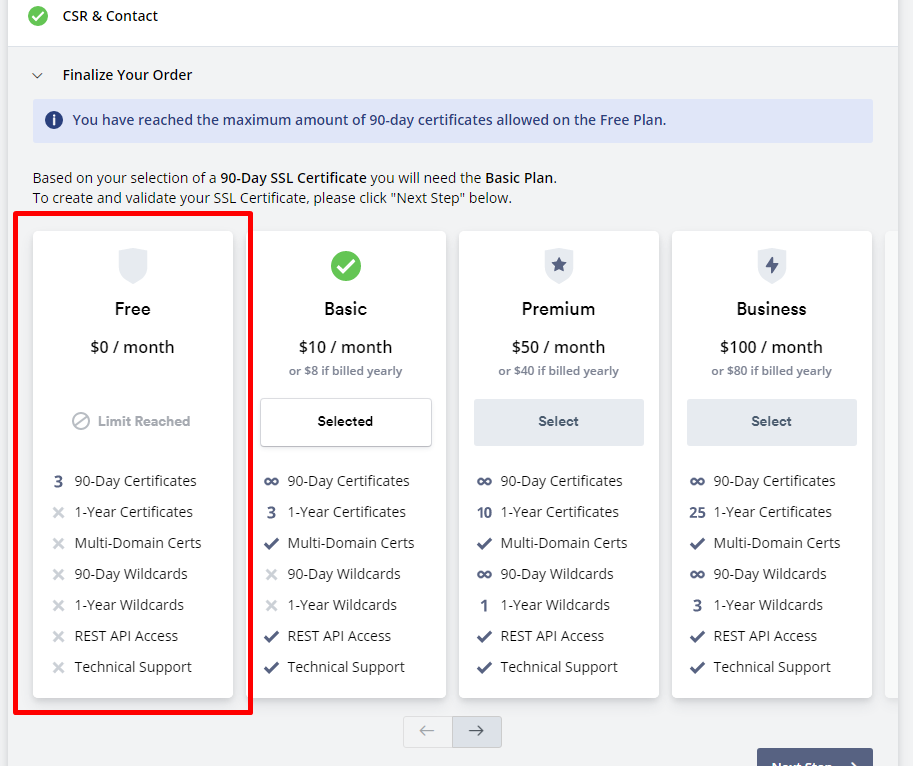
Selecting your plan, if you chose no wild card, you’ll be able to proceed under “Free”
Just to note, unless you are a heavy-duty user and have multiple sites and like spending money. Stick with Free. ZeroSSL will send notifications when renewals are coming up. However, one perk with even the $10 a month is the API call which technically could update your SSL automatically.
Validate Site
Once you get past the above screen you will need to validate your site by email, posting something to the DNS, or posting a html file I believe to your site.
I would do the email, especially if you have a catch-all email that forwards to your personal email. Makes things easier. Note, please check your Junk Mail… I’ve had many a ZeroSSL email slip into the dark pit of junk mail.
Once Verified, Issue the certificate!
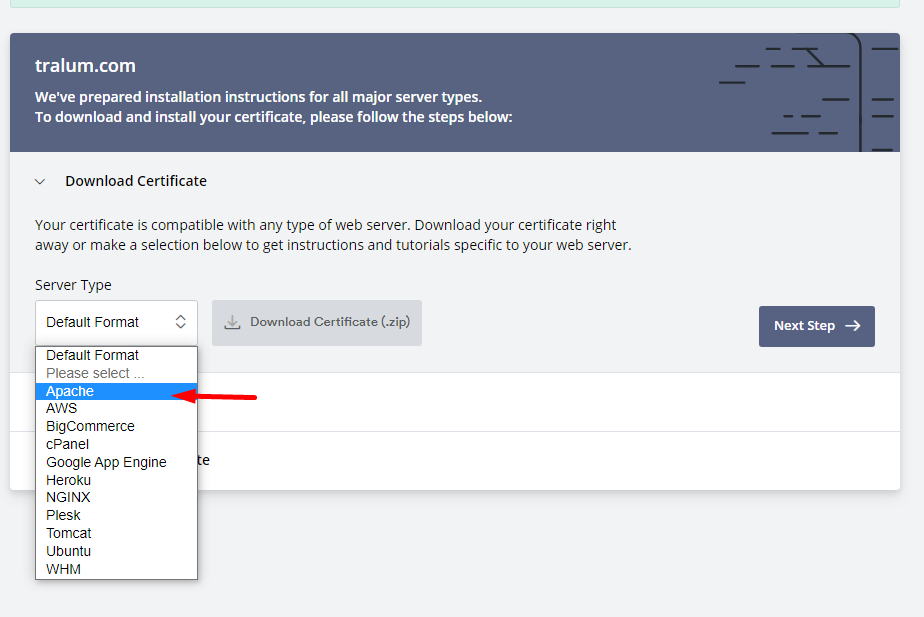
Let’s get this glorious certificate download! You will need to download it for Apache… I know, we are going to use it on IIS, but it works. Trust me!
NOW, for the tricky bit
So far so good. But here is the tricky bit. We now need to download software called OpenVPN and use this to convert our newly downloaded certificate into one that IIS10 will be able to use and understand. So stay with me and we will get through this!
Just for reference, here are a couple of helpful links on what we are about to do if you have questions.
Medium.com and ZeroSSL.com
Install OpenSSL
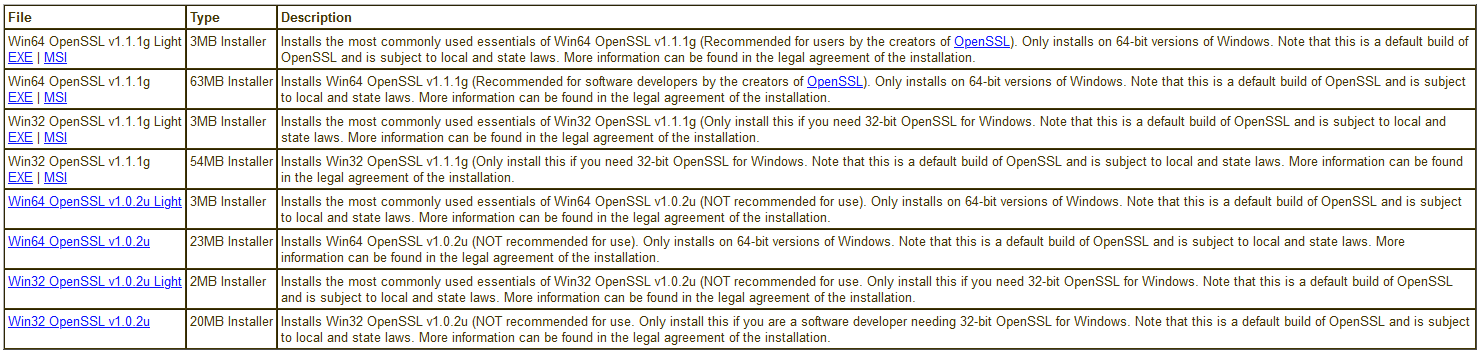
This step is a simple one. Simply choose the version that applies to your PC from here. As an example, I chose the Win64 OpenSSL v1.1.1g MSI (not the light version) from the table:
Run the install! Once installed… RESTART! After you restart your machine you will need to open the command terminal.
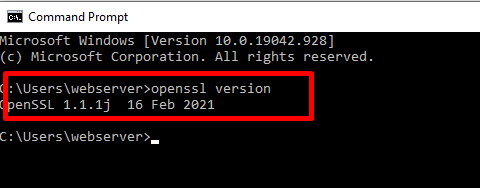
In the terminal, you will need to type openssl version. As shown below. You should see OpenSSL 1… which means it is up and running. If not, try going here to see if it can help.
Time for the fun!
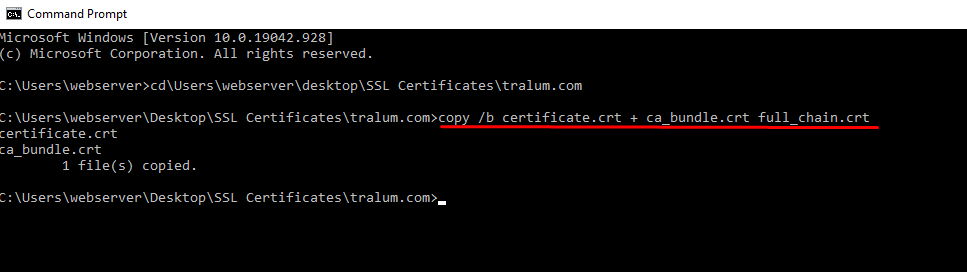
With the Command Prompt still up, you will need to go to the directory your certificates are (make sure they are unzipped). I usually type cd\Users\webserver\desktop\SSL Certificates\tralum.com . I recommend having a text file so you can just copy and paste it for future use. Once you are in the folder that has your certificates, you will need to type the following (again, save it to a text document to make your life easier).copy /b certificate.crt + ca_bundle.crt full_chain.crt
You will see the following:
After this, you will need to type:openssl pkcs12 -export -out certificate.p12 -inkey private.key -in full_chain.crt
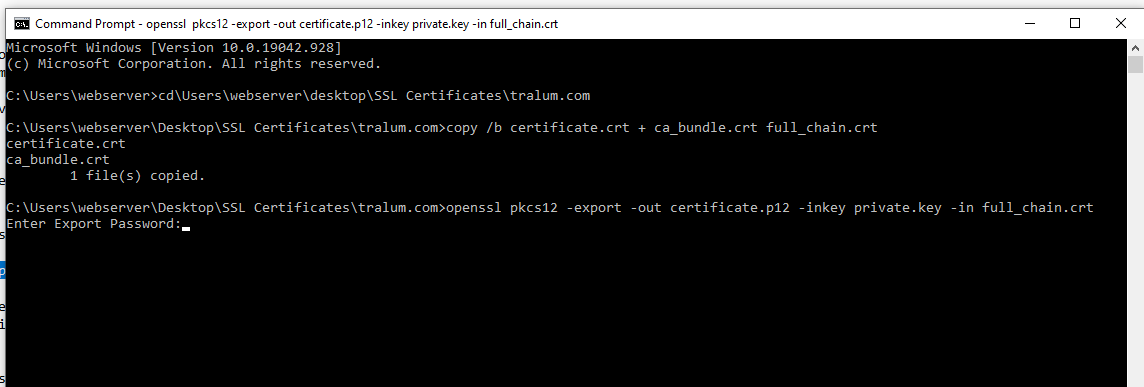
Make sure to write down your password! Lest ye forget and have to repeat this all over! Alright, NOW we have a certificate we can utilize on IIS10!
Add your newly created SSL certificate to your stunning IIS
Almost to the finish line, hopefully, it has gone smoothly for you!
- Open IIS Manager
- Select the main server, then find Server Certificates
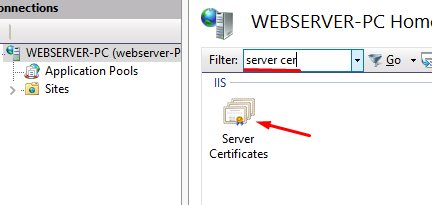
- Double-click Server Certificates to open
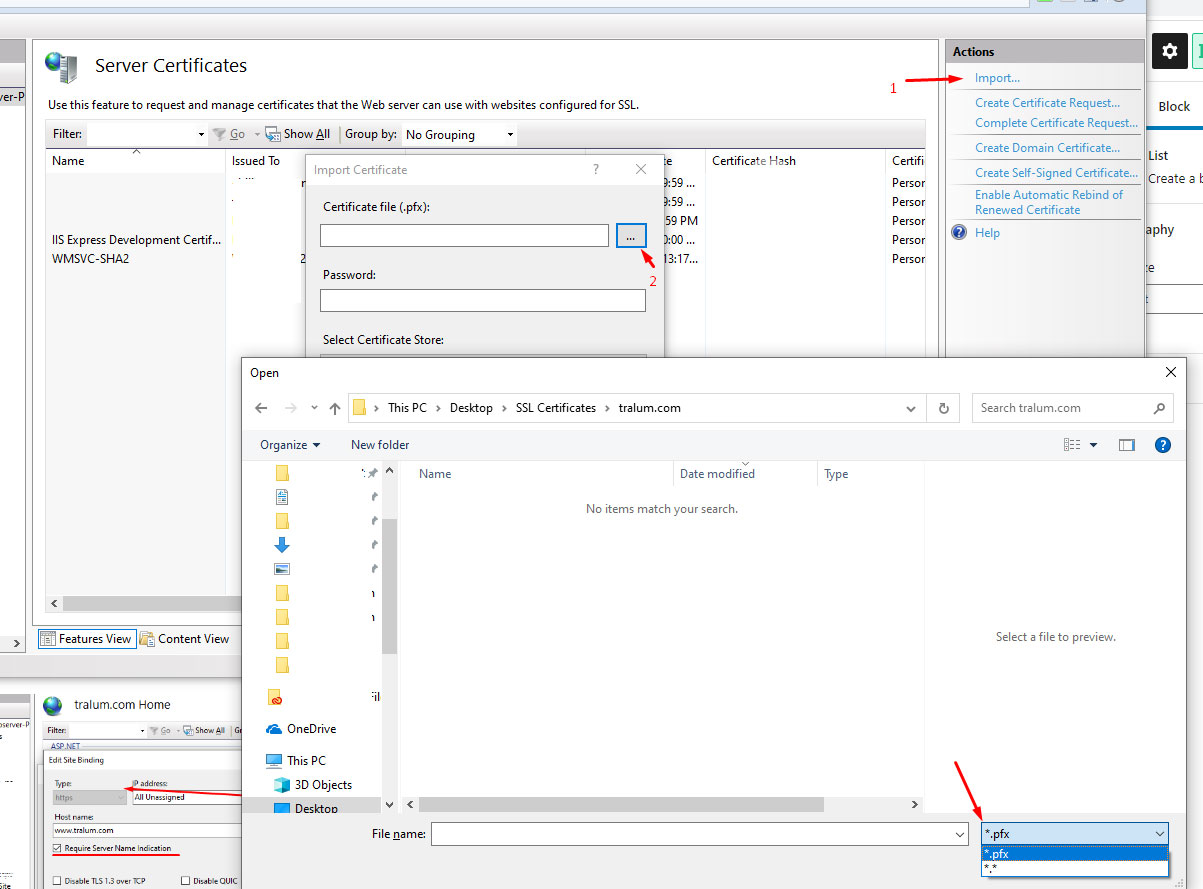
- Select Import on the far right
- Click the three dots on the pop-up box for the Certificate file (.pfx)
- Once you get to the directory, adjust the .pfx to be *.* for all files
- Select “Certificate.p12” — enter the password you wrote down when you were setting this up in the command prompt.
- Once you are done you will see it in your server certificate list
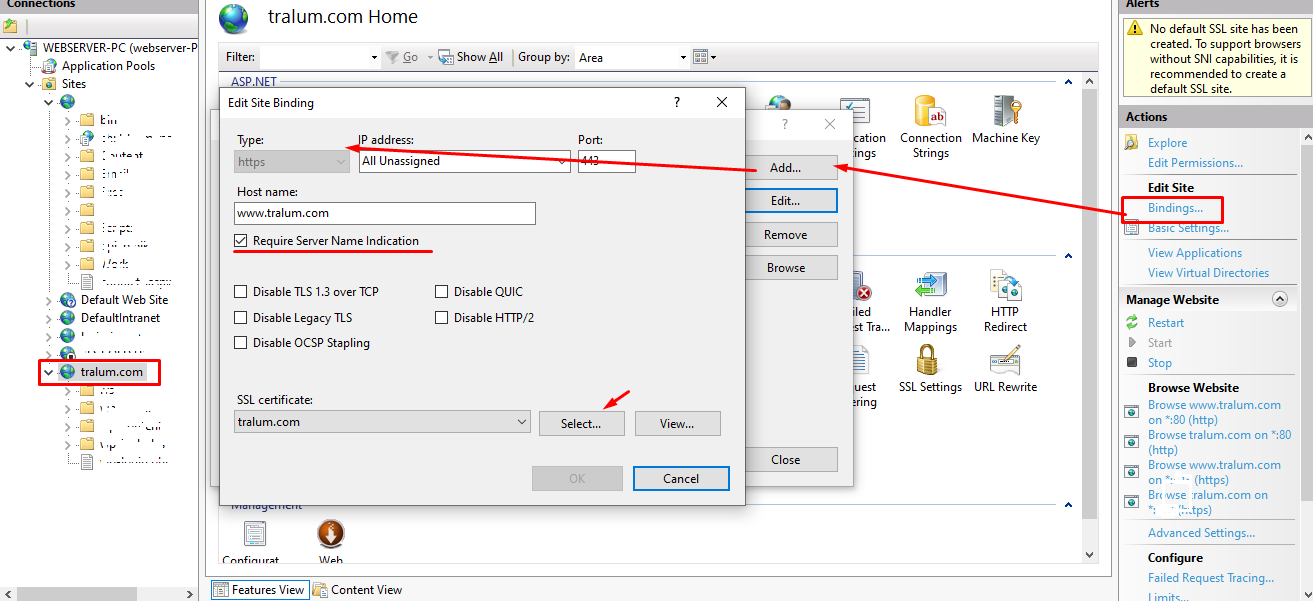
- Click the domain; you will be adding the certificate too
- Click Bindings
- Select Add
- Enter the fields similar to what is in the image below, swapping of course your URL instead of tralum.com
- MAKE SURE TO CHECK “Require Server Name Indication” If you have more than one server and don’t want to get cheeky and have several IP addresses per HTTPS, then check that box!
- Select the SSL Certificate
- Say OK, and now hello, secured site!
Phew..that wasn’t so hard? Well, maybe a little. But now that you’ve got that down, it won’t be hard to create new ZEROSSL Certificates again and again and again!
If you want to know how to force your IIS10 to always go to HTTPS, I will be doing a write-up soon!